The Complete Guide to Handmade Stained Glass: 12 Step-by-Step Projects for Lead-Free Glass Art at Home
$24.99 (as of July 9, 2024 11:28 GMT +00:00 - More infoProduct prices and availability are accurate as of the date/time indicated and are subject to change. Any price and availability information displayed on [relevant Amazon Site(s), as applicable] at the time of purchase will apply to the purchase of this product.)
Kicking Glass: A Creative Guide to Stained Glass Craft
41% Off
Stained Glass Making Basics: All the Skills and Tools You Need to Get Started
15% OffEdge Beading On A Copper Foiled,
Stained Glass Project
Every edge of stained glass has three surfaces…the front surface of the edge, the back surface of the edge, and the outside edge which you see when you hold the panel vertical/perpendicular to your work surface. You are going to put solder on all 3 surfaces of the edge…front, back and outside edge.
Start by fluxing the front surface of the edge. Hold your iron so the tip faces the outside and your hand and the rest of the iron are over the glass. If you hold the iron from the outside facing in, most of the solder will run off due to the heat of the iron pulling the solder down.
Go along and place solder on the front surface. Turn the panel over and do the same on the back surface of the edge. Some solder will run over the edge, from both sides. Don’t worry about it, and don’t worry about making the front and back surfaces perfectly smooth. When you are finished, all three surfaces will be smooth and round.
The final step is to turn the panel so the edge is facing up (vertical to your work surface). I usually use Wedgies to hold my projects in position while I bead the outside edge. Wedgies are wonderful little wedges made specifically for stained glass work. They hold your panels, lampshades, suncatshers, just about anything in position for soldering.
If the panel is round or oval, you will be constantly moving it to keep the spot you are working on absolutely parallel to your work surface. To do this, you will have to hold the panel in one hand while soldering with the other hand. If you tip it too far forward or backward, even just a little, the solder will run in the direction the panel is tipped rather than staying in place and forming a bead.
If you are going to hold the panel in your hand while you work on the outside edge, be sure to wear long sleeves and protective gloves. I have found the Ove Glove tm to be ideal for holding the glass while soldering it. Alternatively,you can hold the panel with a towel that is draped over your hand and arm. Either way will prevent burns from hot solder drips.
Flux the outside edge, then, using a touch and lift motion, go along the edge with your soldering iron. There is usually enough solder, that has run over from the front and back, so you won’t have to add any more. If there isn’t enough, add it wherever it’s needed. Work along the edge slowly.
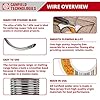
Please note: For this picture, I didn’t edge bead the entire panel. I only did a small section to demonstrate how it is done. I will be putting a wire around the edge of this panel. Instructions on how to add wire will follow.
The solder on all 3 surfaces will round up and give you a nice finished bead.
Wipe the panel off with a paper towel and check it, one more time, for problems. If you’re happy with it, it’s time for the final step.
The next step in this tutorial is Cleaning, Patina and Polishing
Here are More Ways To Finish The Edges


SPEEDWOX 20PCS Heavy Duty Mosaic Wheeled Glass Nippers with Replacement Cutting Wheel Glass Running Pliers Breaker Grozer Pliers Oil Feed Glass Cutter Set Cut Resistant Gloves Leather Zipper Bag
$45.99 (as of July 9, 2024 11:28 GMT +00:00 - More infoProduct prices and availability are accurate as of the date/time indicated and are subject to change. Any price and availability information displayed on [relevant Amazon Site(s), as applicable] at the time of purchase will apply to the purchase of this product.)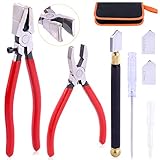


Rustark 3Pcs Premium Glass Running Breaking Pliers and Class Cutter Kit, Heavy Duty Glass Cutting Tool with Rubber Tip, Work Great for Stained Glass, Mosaics, Fusing, Breaking
$22.99 (as of July 9, 2024 11:28 GMT +00:00 - More infoProduct prices and availability are accurate as of the date/time indicated and are subject to change. Any price and availability information displayed on [relevant Amazon Site(s), as applicable] at the time of purchase will apply to the purchase of this product.)


Swpeet 3Pcs Heavy Duty Glass Running Pliers, Breaker Grozer Pliers and Grip Oil Feed Glass Cutter Kit, Professional Stained Glass Cutting Tool with Extra Rubber Tips Perfect for Stained Glass Work
$25.68 (as of July 9, 2024 11:28 GMT +00:00 - More infoProduct prices and availability are accurate as of the date/time indicated and are subject to change. Any price and availability information displayed on [relevant Amazon Site(s), as applicable] at the time of purchase will apply to the purchase of this product.)


Rizom Glass Cutting Tool, Glass Cutter 2-20MM, 8" Tile Nippers, 8" Glass Running Pliers with Curved Jaws, 6" Breaker Grozer Pliers, Glass Cutter Kit for Stained Glass, Tiles, Mosaic Cutting
$35.99 (as of July 9, 2024 11:28 GMT +00:00 - More infoProduct prices and availability are accurate as of the date/time indicated and are subject to change. Any price and availability information displayed on [relevant Amazon Site(s), as applicable] at the time of purchase will apply to the purchase of this product.)