The Complete Guide to Handmade Stained Glass: 12 Step-by-Step Projects for Lead-Free Glass Art at Home
$24.99 (as of July 9, 2024 11:28 GMT +00:00 - More infoProduct prices and availability are accurate as of the date/time indicated and are subject to change. Any price and availability information displayed on [relevant Amazon Site(s), as applicable] at the time of purchase will apply to the purchase of this product.)
Kicking Glass: A Creative Guide to Stained Glass Craft
41% Off
Stained Glass Making Basics: All the Skills and Tools You Need to Get Started
15% OffToilet remedy for glass
When grinding or using your saw many times the glued on pattern wants to peel off. An inexpensive remedy is as follows. Purchase a wax seal for a toilet at a hardware store, approx. $1.75 to $2.50.and it will last you a long time. Take your piece with the pattern glued on and rub your thumb in the wax of the wax seal. Rub the wax over the patterm pc and grind or saw. The pattern stays on the glass and you can remove it by sliding a single edge rasor blade between the glass and the pattern.
Cutter-Oil? Huh?
Many glass cutters have oil reservoirs for dispensing cutting oil while making cuts. Mine did. I loaded it up with oil and proceeded to smear oil all over everything. Now I keep a small jar with a piece of sponge in the bottom. A few drops of cutting oil on the sponge easily saturate it.
When my cutter is not in use, it’s standing in the jar. That leaves enough oil on the cutter for smoothness, but without spreading it all over the glass. As a side benefit, I now almost always know where my cutter is. ALso, a can of cutting oil will now last about 3000 years.
Corner filler – decorative edge
Have corners ever given you a problem, where two pieces of glass meet on an angle (boxes or shades)….I strip the insulation off some electrical wire, take ends and clamp into a cordless drill chuck (tighten down) then clamp the other end(s)in a vise then hit the trigger and slowly twist the 2,3 ro evne 4 wires together in a perfect spiral.(keep tension on wire as you twist it up or it’ll bind) Cut to length, flux and solder into place. It makes for a much nicer looking seam and you’ll use less solder than trying to fill it. This twisted wire also looks great running around the edges of a suncatcher….Try it out.
Making viewing hole for kaleidoscopes
When I made the viewing hole for my first kaleidoscope I used contact paper cut in a small circle to mask the area I did not want etched. It was somewhat irregular when I finished due to my cutting skills and then trying to separate the layers on the contact paper. Eek! The second time I used the small round plastic knobs that are usually sold to use as feet on stained glass boxes and/or etc. They have a bit of adhesive on their flat sides and were the perfect size for the viewing hole and I simply stuck it in the middle of my triangle and etched around it. Result: perfect viewing hole! (I think these are available at most craft stores or hardware stores. There are usually sold as several on a small sheet.) And I believe they are reusable for a few times if you are careful with them.
Foil holder
I find that when I have my foil roll on a table in front of me while foiling it comes off the roll at a slight angle and sometimes kinks. So I put my roll into a CD case. I broke off a small piece of the edge to allow for the foil to come out of. I put the case between my knees which allows the foil to come out nice and straight.
How to make a Soldering Iron stand
Soldering Iron Stand
I have a great way to make your own soldering iron stand from a piece of tin.
The first thing to do is cut a piece of flat tin into a 6″ x 4″ rectangle with either tin snips or a jig saw, don’t forget to wear your safety goggles when using the jig saw.
Once your rectangle has been cut, cut a 1″ wide strip directly down the middle of the rectangle, 3″ long.
Next is to cut a V from the top of that strip so your soldering iron has somewhere to sit.
These soldering iron stands are good because the overhang of tin catches any solder that might drip off the tip and is big enough that you can screw it to your work surface so it won’t move.
Fid and/or Burnisher
A long time ago (20yrs) my first teacher turned me on to BIC lighters. Great for lighting candles and WONDERFUL for using as a fid and burnisher. The rounded edge fits into most curves, the size of the lighter gives you a substantial handle to control it and the plastic glides smoothly across the glass. The bright colors also help you not to lose track of it. Also a great way to recycle lighters.
Clamps to hold projects for edge beading
Wolfcraft makes plastic spring clamps that works fantastic for smaller projects. They have a suction cup on the base, and the clamp swivels 90 degrees to do edges really easy. No more paper in a box!
I bought mine at Ace Hardware for $2.50 a piece. These really are an inexpensive way to secure work.
You can find their site online and then go to the plastic spring clamps section.
Framing your work on a budget
I found a cheap and effective way to show off my projects and give them some strength too.
I got the idea of using picture frames to mount my stained glass projects in from seeing all the cabinet doors that hold glass art. at first I went to a craft store to buy the frames, but they were too expensive. I found I can find lots of various frames at Savers or Salvation army thrift stores. they run about $2.00 or $3.00 a frame and they look great on the wall or in a window. I make the glass project large enough to fit into the lip on the back of the frame. (I discard the cardboard and window glass that comes with the frame) To secure the art I shoot a small bead of clear silicone caulk at the back edge of the glass where it meets the frame lip. I “tool” this bead of silicone with my finger and allow to dry overnight.
The frame enhances the artwork and also gives it strength without using lead cames.
foil dispenser
foil dispenser
take a old cd case and cut out part of the inside to leave the back part and cut a hole on bottom or top to fit the copper foil inside for the foil to come out.
Flying Beetle Cutter
I noticed that my Flying Beetle Cutter was sticking and the spring to raise and lower the cutter blade was no longer working well on it. The directions say you can use cutter oil but you don’t have to. I choose to use cutter oil. Oil collects in the square where the cutter head actually passes through the cutter apparatus and causes the cutter to stick. I found that if I take the cutter apart and use a q-tip to clean the square the cutter spring works again and all is well!
Goop
Not having the cleanser you suggesed I remembered a great product that even works on clothes. The glue just melted off and then I used alcohol to clean off the cleanser. The name is 3M General Purpose Adhesive Cleaner It is for removing adhesive, silicone, wax, grease, tar, oil ect.
I had a friend who was making a junk car into a show car. The cloth in the car still had line marks from where the cloth was marked to diamond tuck the seats. When he complained he was told that this is what they used to remove the lines. I had to go to an automotive shop to get it.
Never doing a repair and only doing stain glass since February of this year, I automatically went to your site. It was so helpful and all I have left is to solder. Thanks again for your wonderful web site.
Household Items Used in Stained Glass Work
I know I might be a bit late but I wanted to add to the household tool suggestions. I use a meat baster to remove some of the water from my grinder so that when I pick it up to empty and clean the grinder it doesn’t spill all over the place. I also use the baster to add water to my sponge to wipe my soldering tips off and sometimes to add a little water to my grinder. It keeps me from lifting a heavier supply jug of water and is neater.
Thank you for all the information and support you provide. I have recommended your site to several people who are beginning to work with stained glass and they are very thankful for your help! Keep up the good work.
Reply
Thanks for that Cathy. Many people reading this probably don’t know what you’re talking about when you say “household tool suggestions”. So, I’ll explain.
A couple of months ago, I asked my ezine subscribers to tell me what household items they use in their stained glass work. I was surprised at the number of replies that I got, and the different things people use from around the house to make working with stained glass easier and less expensive. I shared the list in the next ezine.
The question I asked last month was “what do you use to keep a round project round while you’re constructing it?” Again, I got many replied, and I’ll be sharing them in this months ezine.
Glass stand for edge soldering
When doing an edge solder ,like you, have tried numerous ways to prop the glass piece including a child or spouse helper. Someone either got burned or the piece was always tilting. I had some scrap wood pieces approx.4”x12”.Laying two pieces on edge,a piece of glass width plus just a little more (for solder) apart. I then laid the third piece of wood across the tops of the wood edges and nailed together. Making a T shape. Then I flipped it over. The top part of the T is now the base and the two pieces of wood made a channel for the glass to slide into. Now when I have to edge solder I just put my piece of glass in the channel.You may want to make a bigger base depending on the size of finished piece you are edging but no more helpers or burnt fingers from trying to balance the piece.You can also clamp the base onto your table top.
Copper Foiling With an Electric Frying Pan
I was having trouble getting my copper foil to stick to my glass edges.
I washed the glass edges with water and soap detergent, then I cleaned the glass off with windex to get any oil from my skin off.
I still had trouble with the foil sticking properly so I took a electric frying pan on LOW and left the glass in there about twenty minutes so it would dry and warm up the glass. The foil sticks beautifully.
Doesn’t Cut Cold Glass
Don’t cut cold glass. Repeat: Don’t cut cold glass. I work in an unheated basement…59 deg. The glass is also 59 deg. Cutting 59 deg. glass is called breaking. If you’re having trouble with scores running thither and yon, it might be because the glass is cold. I use a heat-gun to warm it up…both sides please…and the cuts seem to go a lot better.
A better wax job

Three problems often show up for me.
1) The adhesive which holds the foil to the glass has a tendency to ooze out during soldering.
2) The chemicals in the patina sometimes leave traces (an iridescence) on the glass near the solder bead.
3) The wax is simply tough to remove around the base of the solder bead (at the glass).
So during the final waxing, I use a liberal amount of wax and SAWDUST.
While applying the wax, throw on a handful of sawdust and rub that around with the wet wax. This gets the traces of chemicals off of the glass. As its drying, take a sharpened dowel (use a pencil sharpener) and trace along the joint between the solder & glass. This loosens the adhesive which has oozed out and the wax keeps it from re-sticking. When the wax is thoroughly dry wipe the majority off with a soft rag. Again, throw a handful of sawdust on the piece and use it to scour out the remnants of wax stuck down near the base of the solder. I do not like using a toothbrush because the nylon bristles can scratch but the sawdust will not.
So that is it. A trick I’ve learned and wanted to share.
Hanging Around
I was having a heck of a time trying to get my stained glass PEACE SIGN to hang straight in the window! And then it came to me a SWIVEL, you know the little swivels you would use for fishing, it works great, now my PEACE SIGN hangs straight in the window. 🙂 🙂
HAVE A GREAT DAY!
Cellulose Sponge For Cleaning Your Soldering Iron Tip
Stolen from our bathroom cabinet
The small cleaning sponges supplied with most soldering iron stands often need frequequent rinsing and water adding. I use one of these cellulose bath sponges sitting in a container of water. It lasts for hours without needing refreshing and wont burn as it is not synthetic. They are available in the UK from ASDA which is a subsidiary of Walmart.
Grinding without finger cuts
I wear household type Playtex living gloves, the kind that are ‘so flexible you can pick up a dime’ as the old commerical used to say. I can hold the glass firmly as I grind and I no longer cut my fingers on the unground edges. I also wear these gloves when soldering and applying patina.
Storing & Smoothing Scrap Glass
I use glass jars so that I can see through, and put my scrap glass in them by color. I save any besides the very smallest pieces. Then I have 2 rock tumblers (at $20 a piece)and I put bits of the same color of glass in them, do not fill the tumblers, just about 1/2 or little less full and barely cover with the warm water and a little bit of soap and tumble them for about an hour. Then I put the pieces in a strainer and run warm water over them until all of the soap is gone, and lay them out on a towel and pat them dry. I then have jars labeled tumbled and transfer them to the labeled jars. The rock tumbler not only makes the small pieces of glass smooth so you can handle them without fear of slivers or cuts, but it also cleans them of left over oils, flux or whatever. I now have pieces for mosaics, fish aquariums and other uses! It is amazing how many small pieces of scrap glass, if you save it, builds up. This method has worked perfectly for some time with never a drop of blood after doing it. If I find I could use a piece (I do run a little larger pieces through also), I just grind around the edges a little so the foil sticks as before. It has been a very good $20 investment for the rock tumbler…
Use Screw Eyes For Hangers
Instead of buying hangers, use screw eyes. Dip the screw end into flux and drop it into the open end of the zinc came leaving just the eye exposed. The screw can then be soldered to the came. The screw eyes are zinc and accept patina well.


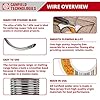
SPEEDWOX 20PCS Heavy Duty Mosaic Wheeled Glass Nippers with Replacement Cutting Wheel Glass Running Pliers Breaker Grozer Pliers Oil Feed Glass Cutter Set Cut Resistant Gloves Leather Zipper Bag
$45.99 (as of July 9, 2024 11:28 GMT +00:00 - More infoProduct prices and availability are accurate as of the date/time indicated and are subject to change. Any price and availability information displayed on [relevant Amazon Site(s), as applicable] at the time of purchase will apply to the purchase of this product.)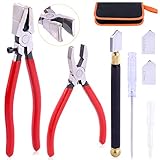


Rustark 3Pcs Premium Glass Running Breaking Pliers and Class Cutter Kit, Heavy Duty Glass Cutting Tool with Rubber Tip, Work Great for Stained Glass, Mosaics, Fusing, Breaking
$22.99 (as of July 9, 2024 11:28 GMT +00:00 - More infoProduct prices and availability are accurate as of the date/time indicated and are subject to change. Any price and availability information displayed on [relevant Amazon Site(s), as applicable] at the time of purchase will apply to the purchase of this product.)


Swpeet 3Pcs Heavy Duty Glass Running Pliers, Breaker Grozer Pliers and Grip Oil Feed Glass Cutter Kit, Professional Stained Glass Cutting Tool with Extra Rubber Tips Perfect for Stained Glass Work
$25.68 (as of July 9, 2024 11:28 GMT +00:00 - More infoProduct prices and availability are accurate as of the date/time indicated and are subject to change. Any price and availability information displayed on [relevant Amazon Site(s), as applicable] at the time of purchase will apply to the purchase of this product.)


Rizom Glass Cutting Tool, Glass Cutter 2-20MM, 8" Tile Nippers, 8" Glass Running Pliers with Curved Jaws, 6" Breaker Grozer Pliers, Glass Cutter Kit for Stained Glass, Tiles, Mosaic Cutting
$35.99 (as of July 9, 2024 11:28 GMT +00:00 - More infoProduct prices and availability are accurate as of the date/time indicated and are subject to change. Any price and availability information displayed on [relevant Amazon Site(s), as applicable] at the time of purchase will apply to the purchase of this product.)