The Complete Guide to Handmade Stained Glass: 12 Step-by-Step Projects for Lead-Free Glass Art at Home
$24.99 (as of July 9, 2024 11:28 GMT +00:00 - More infoProduct prices and availability are accurate as of the date/time indicated and are subject to change. Any price and availability information displayed on [relevant Amazon Site(s), as applicable] at the time of purchase will apply to the purchase of this product.)
Kicking Glass: A Creative Guide to Stained Glass Craft
41% Off
Stained Glass Making Basics: All the Skills and Tools You Need to Get Started
15% Off

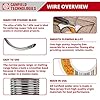
Stained glass lamps are beautiful works of art that bring color and light into a room. They are a wonderful addition to any home, office, or workspace, and can be customized to match any decor. Making a stained glass lamp is not as difficult as you may think, and with a little patience and creativity, you can create your own masterpiece. In this article, we’ll outline the steps you need to follow to make your own stained glass lamp.
Materials Needed:
- Stained glass sheets
- Lead came
- Soldering iron
- Flux
- Lead-free solder
- Soldering board
- Glass cutter
- Grozing pliers
- Putty knife
- Lamp kit
Missing some needed supplies? Checkout these deals here!
Step 1: Gather Your Mater
Before you start, make sure you have all the necessary materials. Stained glass sheets come in a variety of colors and sizes, so choose the colors and sizes that match your design. Lead came is the metal strip used to frame each piece of glass, and it can be found in different widths and profiles. It’s important to use lead-free solder and flux when soldering the lead came, as regular solder contains lead, which is toxic. A soldering board will help you keep the pieces in place while you solder, and a glass cutter is used to cut the glass to size. Grozing pliers are used to trim the edges of the glass, and a putty knife is used to apply the putty. Finally, a lamp kit provides the wiring and socket needed to turn your stained glass shade into a functioning lamp.
Step 2: Cut the Glass
Start by tracing the pattern you want to use onto the stained glass sheets. Use a pencil to trace the pattern, being careful not to apply too much pressure, as this may cause the glass to break. Once you have traced your pattern, use the glass cutter to carefully cut along the traced lines. A glass cutter is a specialized tool that allows you to make clean, straight cuts through the glass. Practice using the glass cutter a few times on scrap pieces of glass until you are confident in your ability to make clean cuts.
Step 3: Assemble the Pieces
Once you have cut the glass to size, it’s time to assemble the pieces. Use the lead came to frame each piece of glass, bending the came to fit the shape of the glass. To join the pieces of lead came together, use the soldering iron to heat the came, then apply the flux and lead-free solder to create a strong bond. The soldering board is useful for holding the pieces in place while you solder, but you can also use a flat surface like a table or countertop.
Step 4: Apply Putty
Once the lead came has been soldered in place, fill any gaps between the glass and the lead came with putty. Putty is a soft, pliable material that dries to a hard finish. Use the putty knife to apply the putty, making sure to fill any gaps completely. Allow the putty to dry completely, then use the grozing pliers to trim any excess putty.
Step 5: Add a Lamp Kit
With the stained glass shade assembled, it’s time to add the lamp kit. The lamp kit includes the wiring, socket, and other components needed to turn your stained glass shade into a functioning lamp. Follow the manufacturer’s instructions carefully when installing the lamp kit, making sure to connect all the wires correctly.
Step 6: Mount the Lamp
Finally, it’s time to mount the lamp. The lamp kit will include instructions on how to mount the lamp, but it is typically a simple process. Simply attach the lamp kit to the base of the lamp, making sure to follow all safety precautions. If you are not confident in your ability to mount the lamp, it’s best to seek assistance from a professional electrician.
Once the lamp is mounted, plug it in and turn it on to admire your handiwork. The light shining through the stained glass will create a warm, colorful glow, bringing your unique design to life.
Tips for Success
Take your time when cutting the glass. Clean, straight cuts will make your stained glass lamp look much better.
Make sure to choose the right size lead came for your stained glass pieces. If the came is too small, it will not provide enough support for the glass. If it is too large, it will overpower the glass and detract from your design.
Use a soldering board or flat surface to hold the pieces in place while you solder. This will make the process much easier and will help you achieve a more professional-looking finished product.
Allow the putty to dry completely before trimming any excess. This will ensure a smooth, seamless finish.
Making a stained glass lamp is a fun and rewarding project that anyone can do. With a little patience and creativity, you can create a beautiful work of art that brings color and light into any room. Whether you’re a seasoned artist or just starting out, the steps outlined in this article will help you make your own stained glass lamp. So gather your materials, and get started on your next project today!


SPEEDWOX 20PCS Heavy Duty Mosaic Wheeled Glass Nippers with Replacement Cutting Wheel Glass Running Pliers Breaker Grozer Pliers Oil Feed Glass Cutter Set Cut Resistant Gloves Leather Zipper Bag
$45.99 (as of July 9, 2024 11:28 GMT +00:00 - More infoProduct prices and availability are accurate as of the date/time indicated and are subject to change. Any price and availability information displayed on [relevant Amazon Site(s), as applicable] at the time of purchase will apply to the purchase of this product.)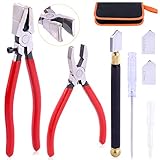


Rustark 3Pcs Premium Glass Running Breaking Pliers and Class Cutter Kit, Heavy Duty Glass Cutting Tool with Rubber Tip, Work Great for Stained Glass, Mosaics, Fusing, Breaking
$22.99 (as of July 9, 2024 11:28 GMT +00:00 - More infoProduct prices and availability are accurate as of the date/time indicated and are subject to change. Any price and availability information displayed on [relevant Amazon Site(s), as applicable] at the time of purchase will apply to the purchase of this product.)


Swpeet 3Pcs Heavy Duty Glass Running Pliers, Breaker Grozer Pliers and Grip Oil Feed Glass Cutter Kit, Professional Stained Glass Cutting Tool with Extra Rubber Tips Perfect for Stained Glass Work
$25.68 (as of July 9, 2024 11:28 GMT +00:00 - More infoProduct prices and availability are accurate as of the date/time indicated and are subject to change. Any price and availability information displayed on [relevant Amazon Site(s), as applicable] at the time of purchase will apply to the purchase of this product.)


Rizom Glass Cutting Tool, Glass Cutter 2-20MM, 8" Tile Nippers, 8" Glass Running Pliers with Curved Jaws, 6" Breaker Grozer Pliers, Glass Cutter Kit for Stained Glass, Tiles, Mosaic Cutting
$35.99 (as of July 9, 2024 11:28 GMT +00:00 - More infoProduct prices and availability are accurate as of the date/time indicated and are subject to change. Any price and availability information displayed on [relevant Amazon Site(s), as applicable] at the time of purchase will apply to the purchase of this product.)