The Complete Guide to Handmade Stained Glass: 12 Step-by-Step Projects for Lead-Free Glass Art at Home
$24.99 (as of July 9, 2024 11:28 GMT +00:00 - More infoProduct prices and availability are accurate as of the date/time indicated and are subject to change. Any price and availability information displayed on [relevant Amazon Site(s), as applicable] at the time of purchase will apply to the purchase of this product.)
Kicking Glass: A Creative Guide to Stained Glass Craft
41% Off
Stained Glass Making Basics: All the Skills and Tools You Need to Get Started
15% Off

Stained glass has been a popular art form for centuries, with its vibrant colors and intricate designs capturing the imagination of artists and art enthusiasts alike. One unique way to incorporate stained glass into your home décor is by creating a stained glass picture frame. In this step-by-step guide, we will show you how to make a stained glass picture frame that will add a touch of elegance to your home. Check out these beautiful examples for inspiration.
Materials and Tools You’ll Need
Before you start, gather the following materials and tools to make your stained glass picture frame:
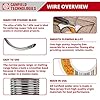
- Stained glass sheets (in desired colors)
- Glass cutter
- Glass grinder
- Copper foil tape
- Soldering iron
- Solder (60/40 lead-free)
- Flux
- Safety goggles
- Latex gloves
- Ruler
- Permanent marker
- Picture frame (for size reference)
Step 1: Design Your Stained Glass Picture Frame
Begin by sketching out a design for your picture frame. Consider factors such as the size of the frame, the shape of the glass pieces, and the colors you want to use. For ideas, browse through these stunning designs.
Step 2: Cut the Glass Pieces
Wearing safety goggles and latex gloves, use the glass cutter to cut the stained glass sheets according to your design. Ensure each piece fits the dimensions of the picture frame.
Step 3: Grind the Glass Edges
Use the glass grinder to smooth the edges of each glass piece. This will help them fit together seamlessly during the assembly process.
Step 4: Apply Copper Foil Tape
Wrap the edges of each glass piece with copper foil tape, ensuring it is centered on the edge. The copper foil will act as a surface for the solder to adhere to, connecting the pieces.
Step 5: Assemble the Picture Frame
Place the glass pieces on a flat surface, aligning them to form the picture frame design. Make sure that the copper foil edges are touching.
Step 6: Solder the Frame
Apply a thin layer of flux to the copper foil seams. Then, using the soldering iron and lead-free solder, solder the seams together, ensuring a secure and even bond. For a polished look, you can apply a patina to the solder lines.
Step 7: Attach the Frame to a Backing
To complete your stained glass picture frame, attach it to a sturdy backing material, such as wood or acrylic, cut to the same dimensions as your frame. This will provide support and make it easy to display your framed photos or artwork.
Creating a stained glass picture frame is a fun and rewarding project that allows you to showcase your creativity and add a touch of elegance to your home décor. With the right materials, tools, and a little patience, you can create a stunning, one-of-a-kind piece that will be admired for years to come. If you’re ready for more advanced stained glass projects, explore these gorgeous examples for inspiration


SPEEDWOX 20PCS Heavy Duty Mosaic Wheeled Glass Nippers with Replacement Cutting Wheel Glass Running Pliers Breaker Grozer Pliers Oil Feed Glass Cutter Set Cut Resistant Gloves Leather Zipper Bag
$45.99 (as of July 9, 2024 11:28 GMT +00:00 - More infoProduct prices and availability are accurate as of the date/time indicated and are subject to change. Any price and availability information displayed on [relevant Amazon Site(s), as applicable] at the time of purchase will apply to the purchase of this product.)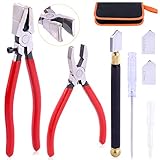


Rustark 3Pcs Premium Glass Running Breaking Pliers and Class Cutter Kit, Heavy Duty Glass Cutting Tool with Rubber Tip, Work Great for Stained Glass, Mosaics, Fusing, Breaking
$22.99 (as of July 9, 2024 11:28 GMT +00:00 - More infoProduct prices and availability are accurate as of the date/time indicated and are subject to change. Any price and availability information displayed on [relevant Amazon Site(s), as applicable] at the time of purchase will apply to the purchase of this product.)


Swpeet 3Pcs Heavy Duty Glass Running Pliers, Breaker Grozer Pliers and Grip Oil Feed Glass Cutter Kit, Professional Stained Glass Cutting Tool with Extra Rubber Tips Perfect for Stained Glass Work
$25.68 (as of July 9, 2024 11:28 GMT +00:00 - More infoProduct prices and availability are accurate as of the date/time indicated and are subject to change. Any price and availability information displayed on [relevant Amazon Site(s), as applicable] at the time of purchase will apply to the purchase of this product.)


Rizom Glass Cutting Tool, Glass Cutter 2-20MM, 8" Tile Nippers, 8" Glass Running Pliers with Curved Jaws, 6" Breaker Grozer Pliers, Glass Cutter Kit for Stained Glass, Tiles, Mosaic Cutting
$35.99 (as of July 9, 2024 11:28 GMT +00:00 - More infoProduct prices and availability are accurate as of the date/time indicated and are subject to change. Any price and availability information displayed on [relevant Amazon Site(s), as applicable] at the time of purchase will apply to the purchase of this product.)