The Complete Guide to Handmade Stained Glass: 12 Step-by-Step Projects for Lead-Free Glass Art at Home
$24.99 (as of July 9, 2024 11:28 GMT +00:00 - More infoProduct prices and availability are accurate as of the date/time indicated and are subject to change. Any price and availability information displayed on [relevant Amazon Site(s), as applicable] at the time of purchase will apply to the purchase of this product.)
Kicking Glass: A Creative Guide to Stained Glass Craft
41% Off
Stained Glass Making Basics: All the Skills and Tools You Need to Get Started
15% OffYou will need to obtain some stained glass tools and supplies before you start working with glass. Some of the tools and supplies I’m going to show you can be improvised from things you have around the house. Also, you don’t need to buy everything at once. You can start out with the basics (I have noted which ones are basic with a (Basic) after the name of the item) and buy the more specialized tools as you need or want them. You can buy these locally or you can do what I do and order on Amazon, I use them because it’s fast shipping and I don’t like to wait! lol
Stained Glass Tools and Supplies
Patterns There are hundreds of free patterns on the internet. You can find most of them Here


Pistol Grip Oil Cutter
Oil Cutters (Basic) You will find a variety of styles as well as brands of oil glass cutters. Toyo is my favorite brand, but you can also choose from Studio Pro, Inland or Fletcher.
To keep things simple, I’d recommend starting out with a comfort grip or pencil grip cutter. They are one in the same, just different names for different brands. They are called that because you hold them like a pencil and they are comfortable to hold. These stained glass tools will cost between $40-$50.
Don’t get a cheap glass cutter from the hardware store. They aren’t meant for stained glass and will cause you a lot of frustration.

Cutting Oil (Basic) is used on the wheel of your glass cutter when you’re scoring glass. You can put the oil in the oil cutter’s reservoir if you want, or you can occasionally dip the glass cutter wheel in oil as you’re scoring glass for a project.
Instead of cutting oil, you can use 3 in 1 oil, sewing machine oil, kerosene, or lamp oil. I use lamps oil because I have an abundance of it for my oil lamps. I like it because it’s cheap and it doesn’t have the odor that you get from kerosene.

Running Pliers (Basic) are used to break out the glass once it’s scored. These stained glass tools are extremely useful and will break out almost any shape that you score. You will spend around $10 on them.

Breaking/Grozing Pliers (Basic) are used to help you break out the glass, but in quite a different way than the running pliers. They’ll cost you around $8.00. Do not use regular pliers from around the house. They are not a replacement for breaking/grozing pliers.

Soldering Iron (Basic) This is an important one. Get a good quality soldering iron. I recommend the Weller 100PG. If you take care of it, it will last a long time. I’ve had mine for 15 years and it’s still working like it did when it was new. Around $50-70 depending on where you buy your stained glass tools.

Soldering Iron Stand (Basic) You must have one of these since a hot soldering iron will be put down frequently when you’re soldering. Make sure you get a stand that holds the iron firmly in place. The flimsy little stands that are made from aluminum and have a small V on top to hold the iron are dangerous. The iron falls off of them so please don’t get one. You will spend around $10 for a stand like the one pictured.

Safety glasses (Basic) are extremely important to have as part of your basic and necessary stained glass tools …they are a must have. You do not want to cut glass without wearing safety glasses. The ones pictured cost $5.00

Abrasive Stone You can find them in the hunting department at Walmart (they are used to sharpen knifes), as well as many stained glass supply stores. These stones are great for taking off burrs and rough or sharp edges on the glass. They will cost around $7.00 Do not get an aluminum oxide stone.

Burnishing Tool or Fid (Basic) is used to press down the foil so there are no gaps between the foil and the glass. You can substitute the barrel of a ball point pen, a chop stick or a small wooden dowel to burnish the foil. I use a small wooden wallpaper seam roller that I had around the house. A burnishing tool will cost you anywhere from $3.00 to $7.00

Copper Foil (Basic) Get 1/4″ copper foil until you get confident with foiling. You have several brands to choose from. Make sure you get copper foil, not black back or silver back…just plain copper foil. You will probably want the other backings as you proceed making projects, but for now, just plain copper foil is all you need. My favorite brand is Edco. You can find it here

A small pair of Scissors (Basic) are used to cut the copper foil. These are just ordinary scissors available at Amazon, WalMart, Dollar General, etc.

60/40 Solder (Basic) Make sure you get pure 60/40 solder, not solder used for electronics work. All stained glass suppliers carry solder, and you can get it at most hardware stores, although I recommend getting it from a stained glass supplier only because they carry the best quality solder for stained glass work.

Flux(Basic) is necessary when you solder. There are several brands available. Make sure you get one for that is appropriate for copper foil, and try to get one that does not produce a lot of smoke. Classic 100 is a good, odorless and smokeless flux. You will pay around $15.00 to $20.00 depending on the brand and where you buy your stained glass tools and supplies.
Flux Brush (Basic) is used to apply the flux, but you can use a Q-Tip to instead. That’s what I use because they are cheap and disposable. If you buy flux brushes, you will pay around $8-$10 for 12 of them. Sometimes the flux you buy will come with a brush or two also it just depends on the manufacturer.

Patina will be used when you are finished soldering and cleaning a copper foil project. It will turn the solder either copper or black (depending on whether you buy copper or black patina). It will cost around $10 or so.

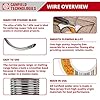
Fume Extractor/Smoke Absorber (Basic) his is one of the most important stained glass tools to use when you solder. I will discuss fume extractors more when you get to the soldering instructions, so you can wait to buy one until then. A fume extractor will cost $55 to over $200 depending on the system you decide to get. Here’s how it works:
Fine Tip Permanent Black Marking Pen (Basic) like a Sharpie. I use the Fine Point Staedtler Lumocolor Permanent Marker, but they only come in boxes of 12. The Sharpie will work fine while you’re learning. It will cost about$2.00

White Poster Board (Basic) is used to make pattern pieces. I get mine at a stationary store like Staples, and Walmart has it for around $2.00 per sheet.
Medium Tip Ball Point Pen is used when you trace the pattern to make pattern pieces. It will give you the correct width line to cut out, leaving the right amount of space to allow for the copper foil.

Black Carbon Paper is used when you’re tracing your pattern on to the poster board.
Pattern Shears/Scissors are used by some people to cut out pattern pieces. They are supposed to leave the correct space between each pattern piece to allow room for the foil or lead (there are specific shears for each one).
Glass (Basic) Get a few pieces of ordinary double strength window glass to use for practice. Most hardware stores carry window glass. Wait to get your colored/stained glass until you know what you want to do for your first real project. The stained glass will cost you from around $6.00 to $1`0.00 per square foot piece. You can get your stained glass at the same store where you buy your other stained glass tools.
Grinder (Basic) A grinder is used to smooth down the edges of the glass and to re-shape pieces that are a little large. The same things can be accomplished with a carborundum stone, it just takes a little longer. Grinders cost around $80 to $200
Most of these supplies and tools for stained glass can be purchased at Amazon I order from them and I’m extremely happy with their service and prices. However, if you have a local stained glass supply business, that’s the place you should visit first, especially for buying glass. Each piece of glass will look a little different, so it helps to see what is available and pick out exactly what you need.


SPEEDWOX 20PCS Heavy Duty Mosaic Wheeled Glass Nippers with Replacement Cutting Wheel Glass Running Pliers Breaker Grozer Pliers Oil Feed Glass Cutter Set Cut Resistant Gloves Leather Zipper Bag
$45.99 (as of July 9, 2024 11:28 GMT +00:00 - More infoProduct prices and availability are accurate as of the date/time indicated and are subject to change. Any price and availability information displayed on [relevant Amazon Site(s), as applicable] at the time of purchase will apply to the purchase of this product.)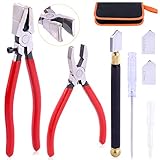


Rustark 3Pcs Premium Glass Running Breaking Pliers and Class Cutter Kit, Heavy Duty Glass Cutting Tool with Rubber Tip, Work Great for Stained Glass, Mosaics, Fusing, Breaking
$22.99 (as of July 9, 2024 11:28 GMT +00:00 - More infoProduct prices and availability are accurate as of the date/time indicated and are subject to change. Any price and availability information displayed on [relevant Amazon Site(s), as applicable] at the time of purchase will apply to the purchase of this product.)


Swpeet 3Pcs Heavy Duty Glass Running Pliers, Breaker Grozer Pliers and Grip Oil Feed Glass Cutter Kit, Professional Stained Glass Cutting Tool with Extra Rubber Tips Perfect for Stained Glass Work
$25.68 (as of July 9, 2024 11:28 GMT +00:00 - More infoProduct prices and availability are accurate as of the date/time indicated and are subject to change. Any price and availability information displayed on [relevant Amazon Site(s), as applicable] at the time of purchase will apply to the purchase of this product.)


Rizom Glass Cutting Tool, Glass Cutter 2-20MM, 8" Tile Nippers, 8" Glass Running Pliers with Curved Jaws, 6" Breaker Grozer Pliers, Glass Cutter Kit for Stained Glass, Tiles, Mosaic Cutting
$35.99 (as of July 9, 2024 11:28 GMT +00:00 - More infoProduct prices and availability are accurate as of the date/time indicated and are subject to change. Any price and availability information displayed on [relevant Amazon Site(s), as applicable] at the time of purchase will apply to the purchase of this product.)